Power Query can feel intimidating when you first open it. With its many buttons, unfamiliar errors, and unique formula language, it can quickly overwhelm new users. However, mastering Power Query is well worth the effort. This powerful Excel tool will save you a ton of time by automating data import, cleaning, and transformation tasks.
In this Power Query tutorial, we will cover seven essential tips to make Power Query easier to use and help you get started on the right foot. Whether you are new to Power Query or looking to sharpen your skills, these tips will guide you through common challenges and powerful features.
Video Tutorial
Watch on YouTube & Subscribe to our Channel
Downloads
Understanding What Power Query Is and Is Not
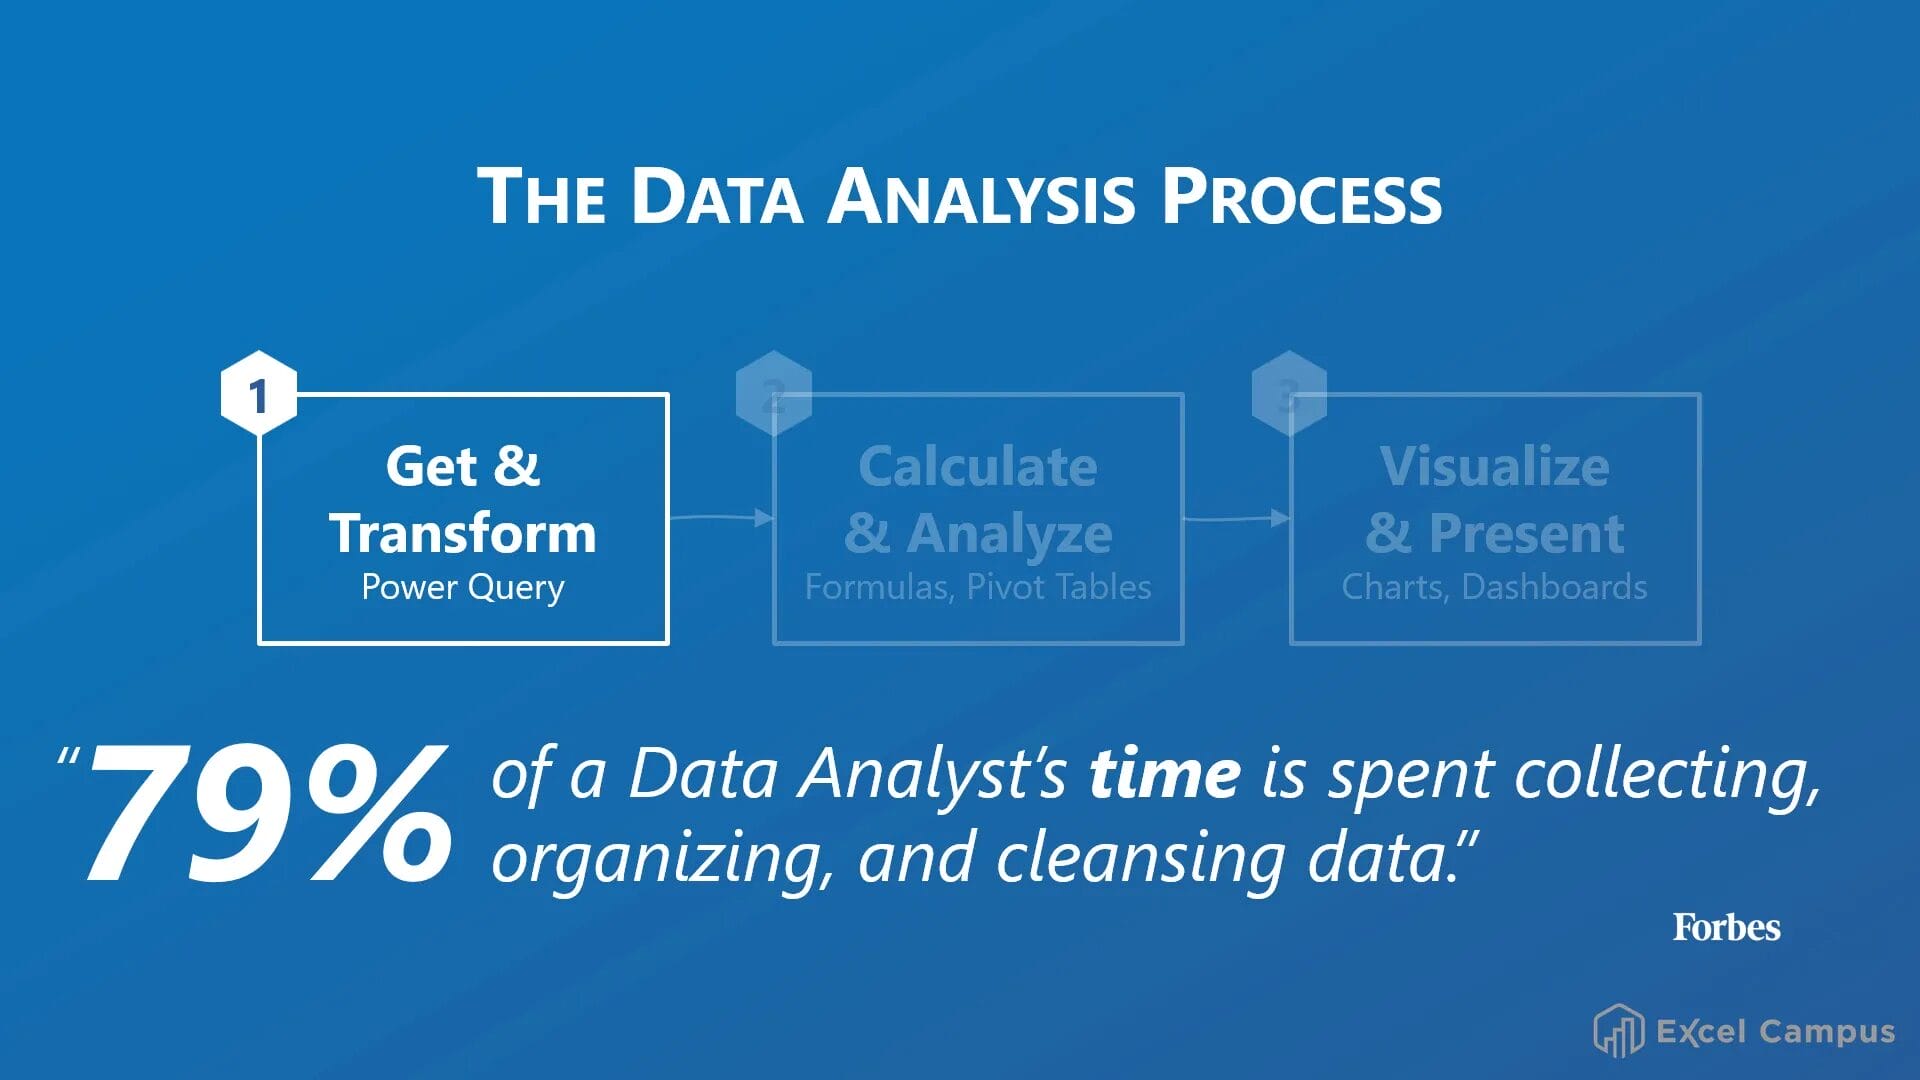
The first step in using Power Query effectively is understanding its purpose. Power Query is designed to bring data into Excel and clean it up. It automates the process of collecting and transforming data so that you can analyze it more easily.

Power Query is not a replacement for formulas, pivot tables, or charts. Instead, it complements these tools by handling the tedious and repetitive task of data preparation.
Studies show that data professionals spend nearly 80% of their time collecting, organizing, and cleansing data. Power Query helps automate this crucial first step.
Tip 1: Import and Combine Data from Multiple Files
One of Power Query’s standout features is its ability to import data from many sources, including CSV files, databases, and folders. If you have multiple CSV files with similar data, Power Query can combine them into a single table.
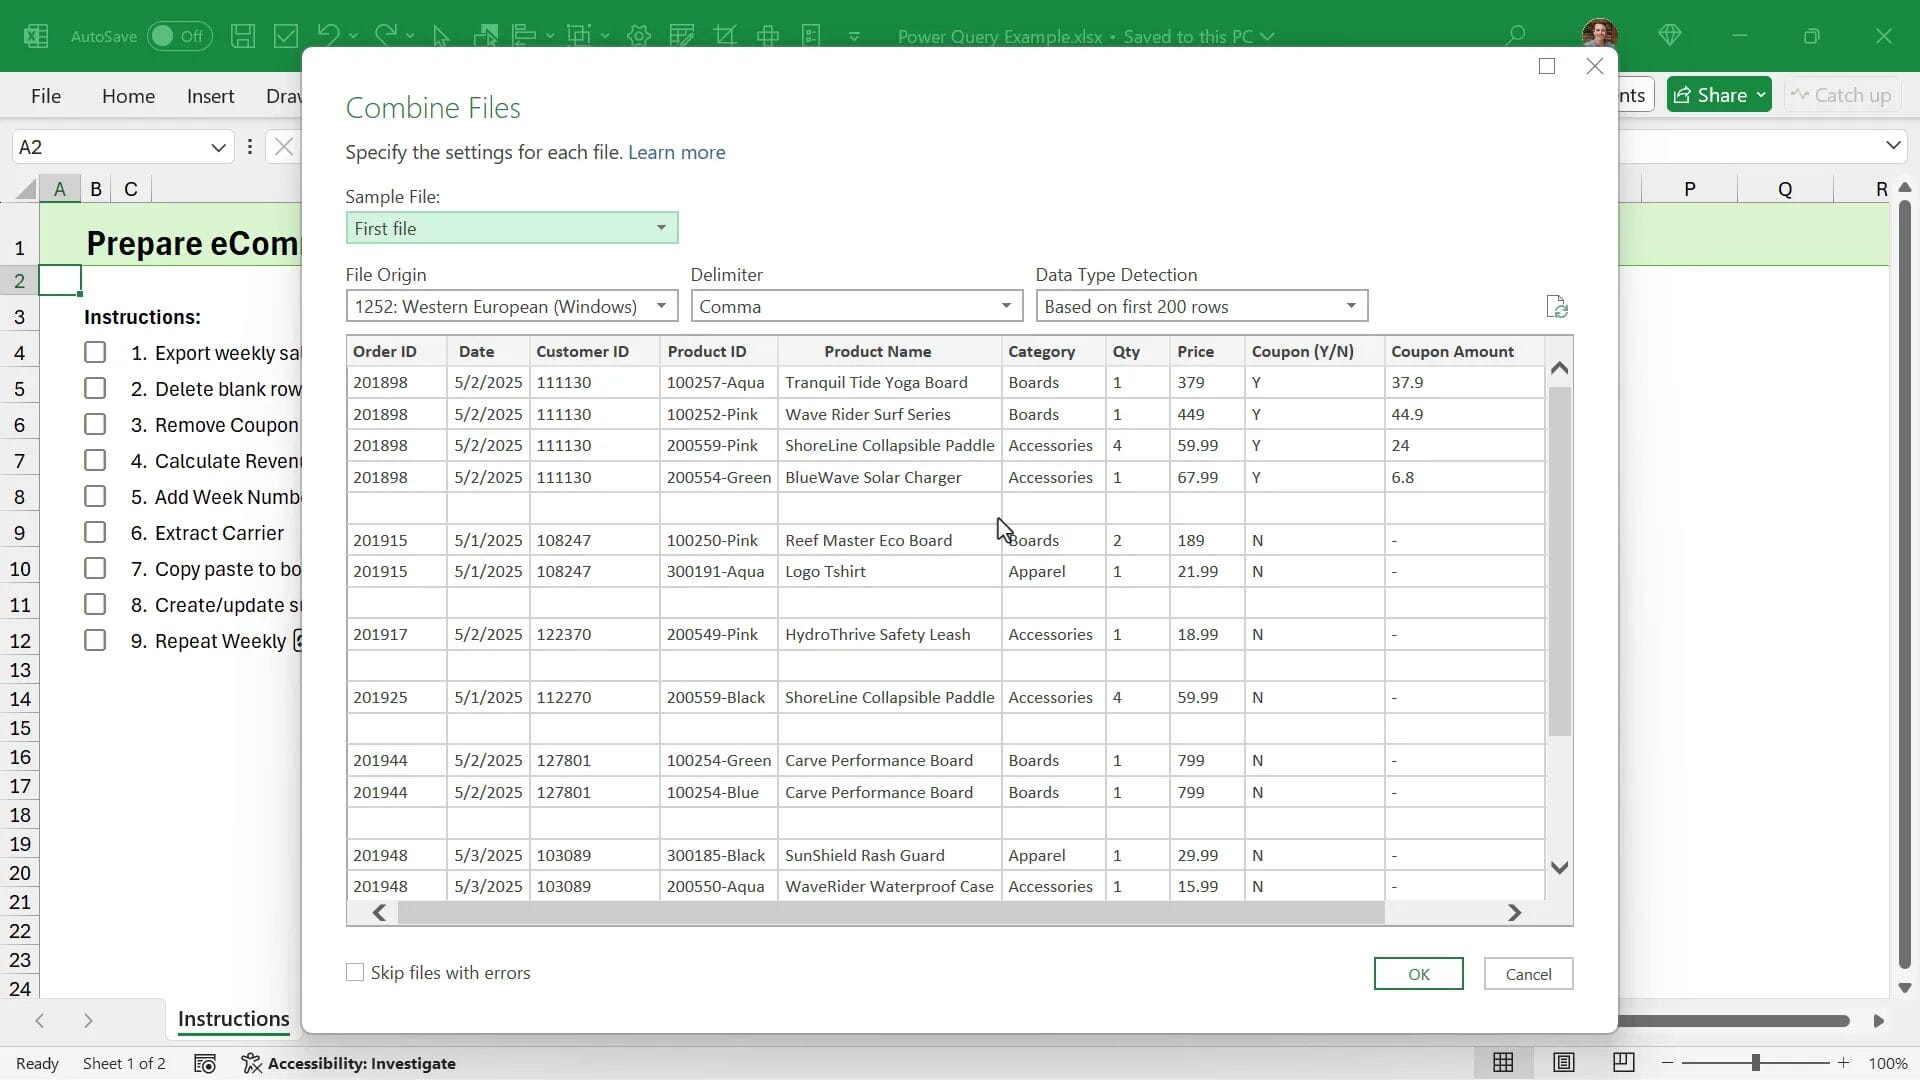
Here’s how to combine CSV files stored in a folder:
- Go to the Data tab in Excel and find the Get & Transform Data section.
- Choose From Folder and select the folder containing your CSV files.
- Power Query will show a preview of all files in the folder. Click Combine and Transform to stack the files on top of each other.
- Review the preview and click OK to open the Power Query Editor.
Once combined, all the data from each CSV will be stacked vertically in one table. This is perfect for consolidating weekly or monthly reports.
Tip 2: Clean Data by Removing Blank Rows and Unnecessary Columns
After importing your data, the next step is to clean it up. Power Query makes this simple with built-in filters and transformation tools.
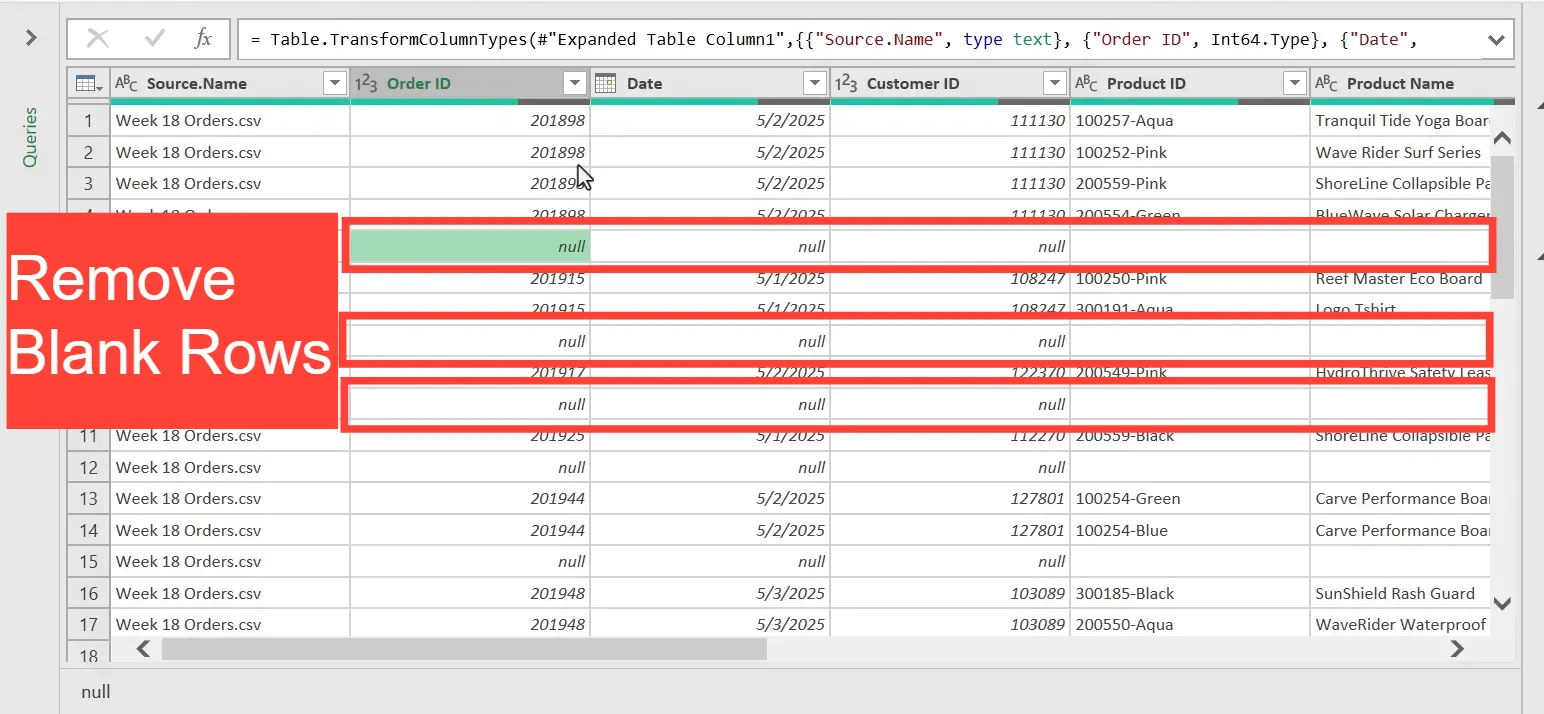
To remove blank rows, which Power Query calls null values:
- Click the filter dropdown on any column.
- Uncheck the null option to exclude blank rows.
To remove unwanted columns, just right-click the column header and select Remove, or press the Delete key.
After cleaning, click the Close & Load button on the Home tab to output the cleaned data to a new worksheet.
Tip 3: Use the Applied Steps Window as a Personal Time Machine
One of Power Query’s most valuable features is the Applied Steps pane on the right side of the editor. This pane records every transformation you make as sequential steps.
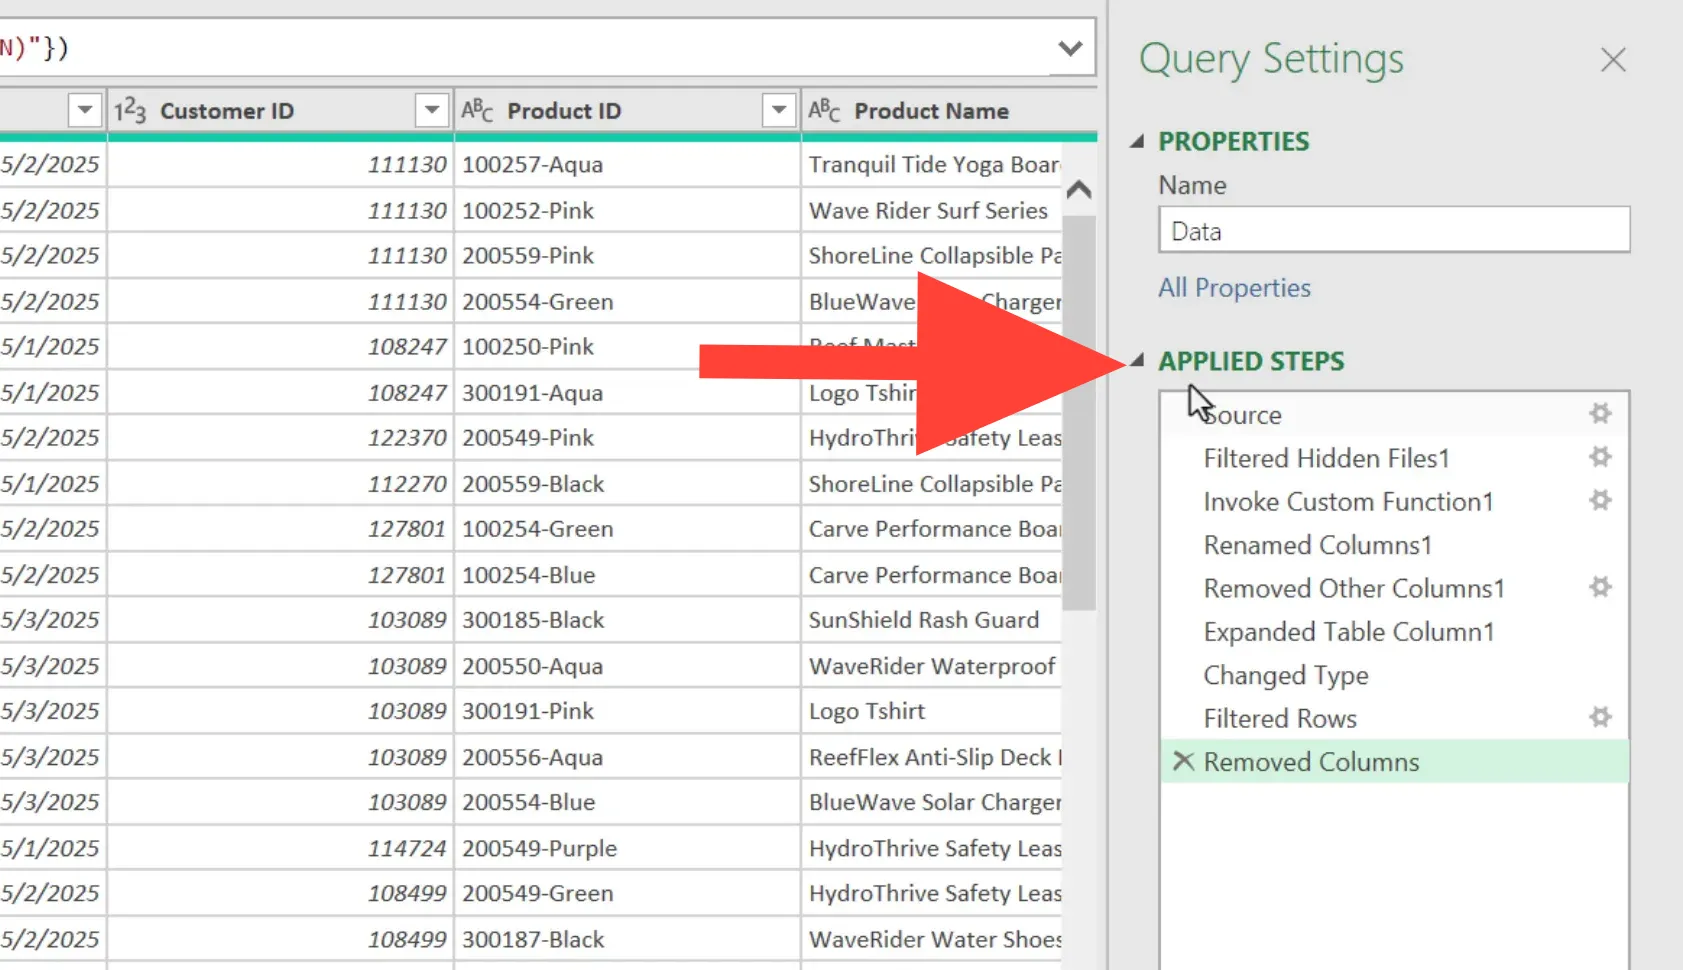
This works like a personal time machine, allowing you to:
- Click any step to see what the data looked like at that point.
- Delete or reorder steps to fix mistakes.
- Modify steps if your data or requirements change.
When you refresh your query, Power Query reruns all these steps on the new data. For example, if you add a new CSV file to the folder, simply refresh your query, and Power Query will automatically include the new data without repeating your manual work.
Tip 4: Manage Data Types Carefully to Avoid Errors
Data types are crucial in Power Query and a common source of errors, especially for new users. Each column in Power Query has a data type, such as whole number, text, or decimal number.

Power Query tries to detect data types automatically when you create a query, but it doesn’t always get it right. For example, a column with dashes (“-“) might be detected as text instead of numbers, causing errors when you try to convert it.
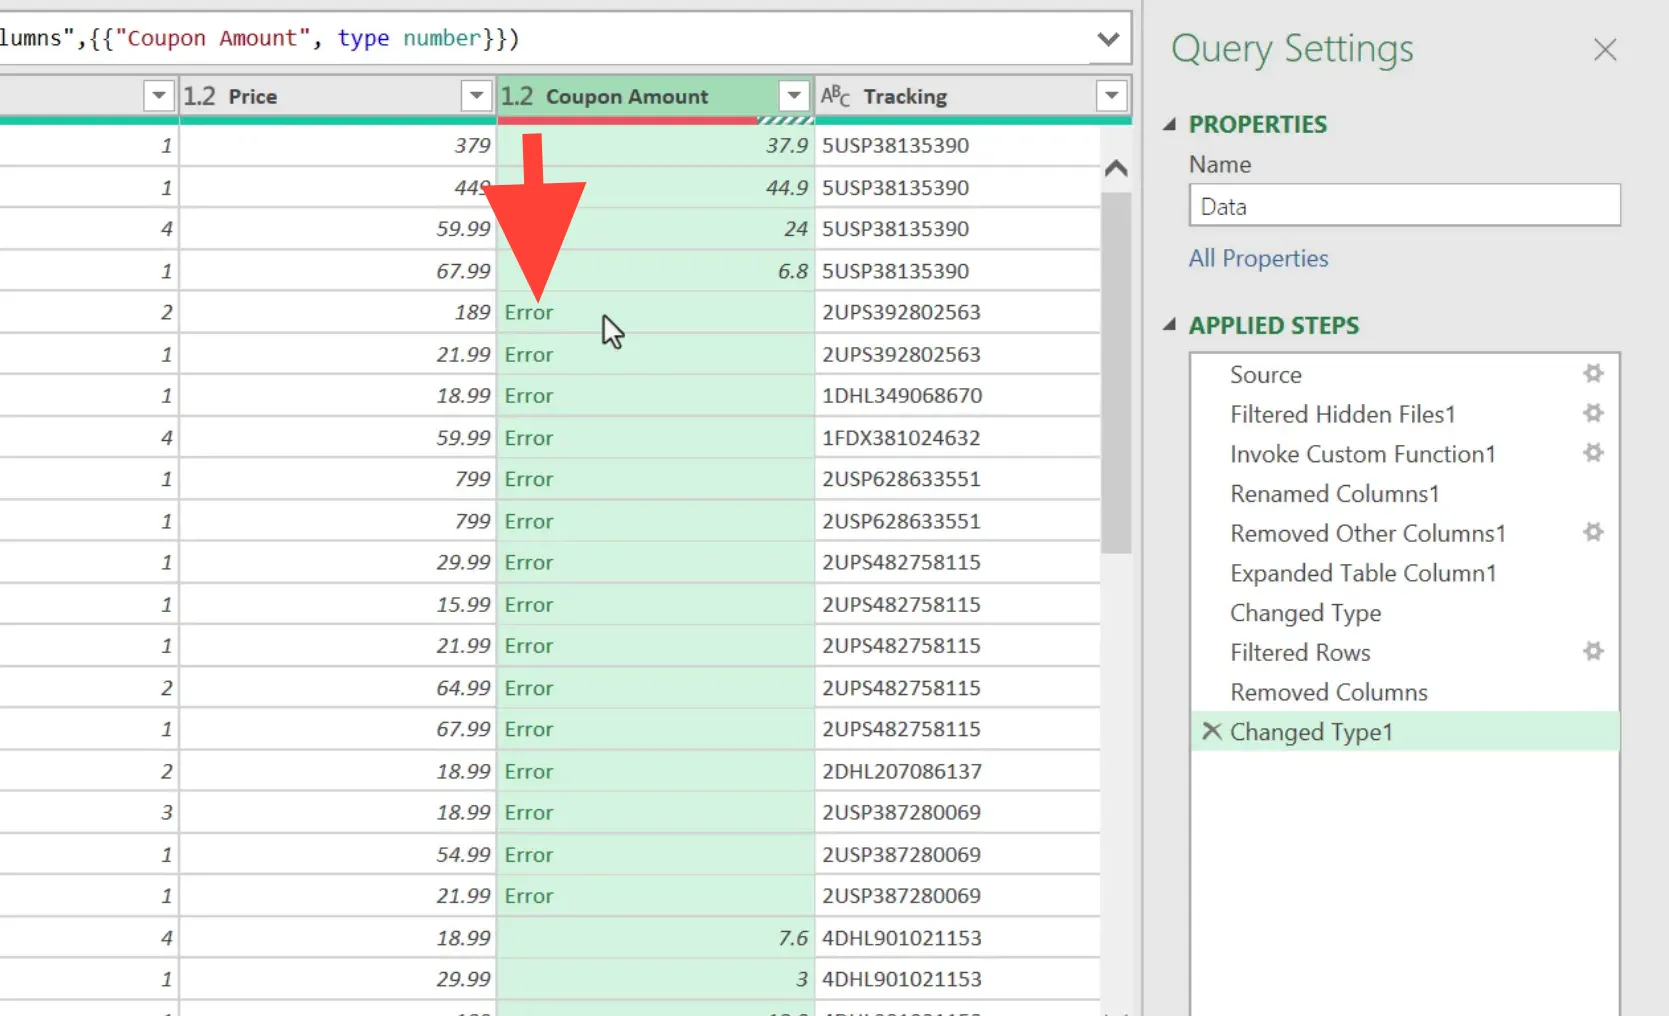
To fix this:
- Identify problematic values like dashes or other placeholders.
- Use the Replace Values feature on the Transform tab to replace these with zeros or appropriate values.
- Change the data type of the column to the correct type after cleaning.
Taking the time to ensure your data types are correct will save you headaches when analyzing the data later with formulas or pivot tables.
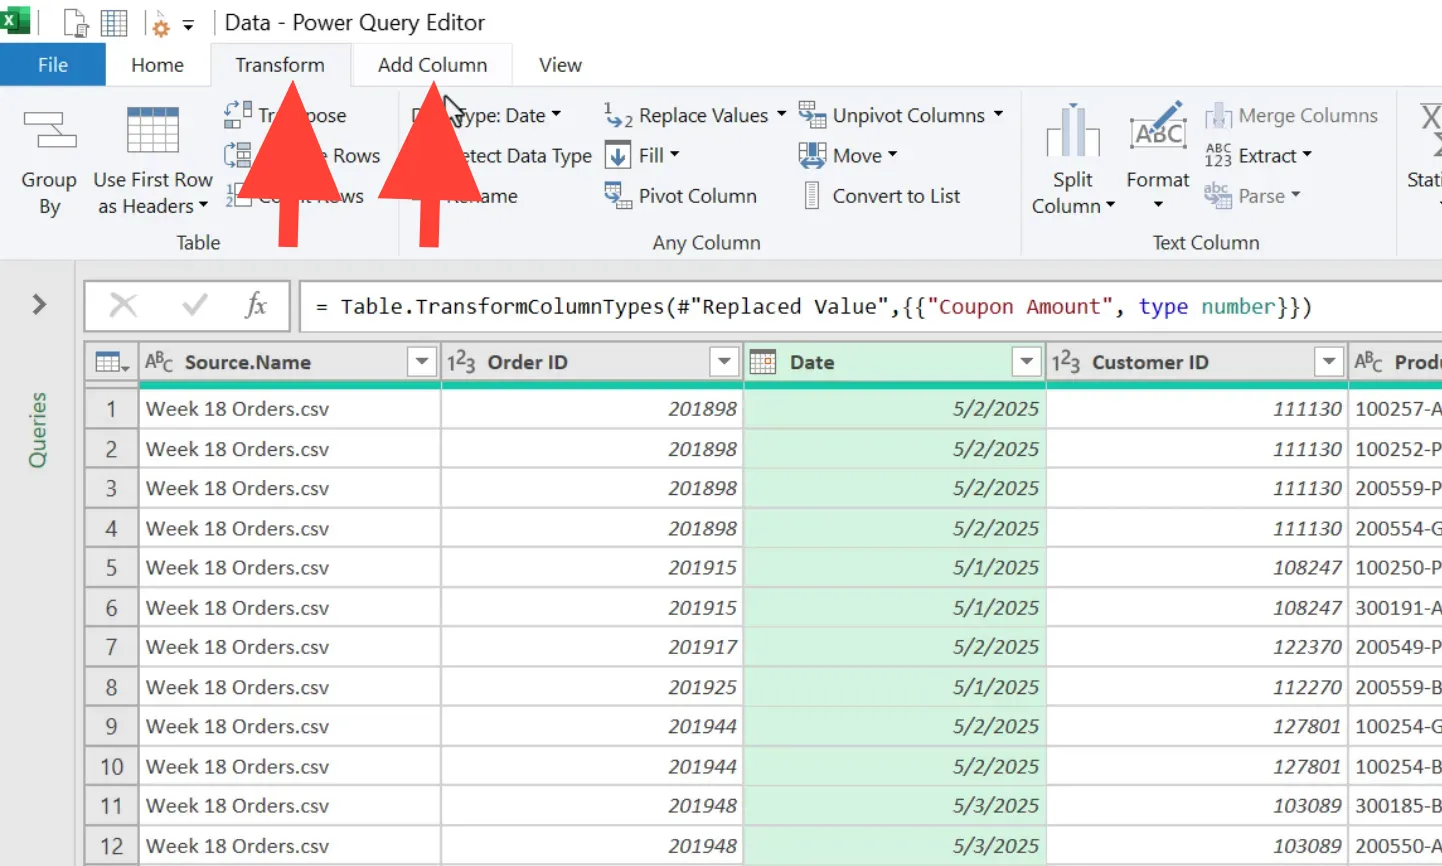
Tip 5: Know Which Ribbon Tab to Use for Your Transformations
Power Query has two main tabs in its editor ribbon: Transform and Add Column. They contain many similar buttons but serve different purposes.
If you want to modify existing columns, use the Transform tab. If you want to create new columns based on calculations or extractions, use the Add Column tab.
For example, to calculate a week number from a date:
- Using the Transform tab’s Week of Year option will replace the date column with week numbers.
- Using the Add Column tab’s Week of Year option will add a new column with the week number, preserving the original date column.
Choosing the right operation helps keep your data organized and avoids accidental overwrites.
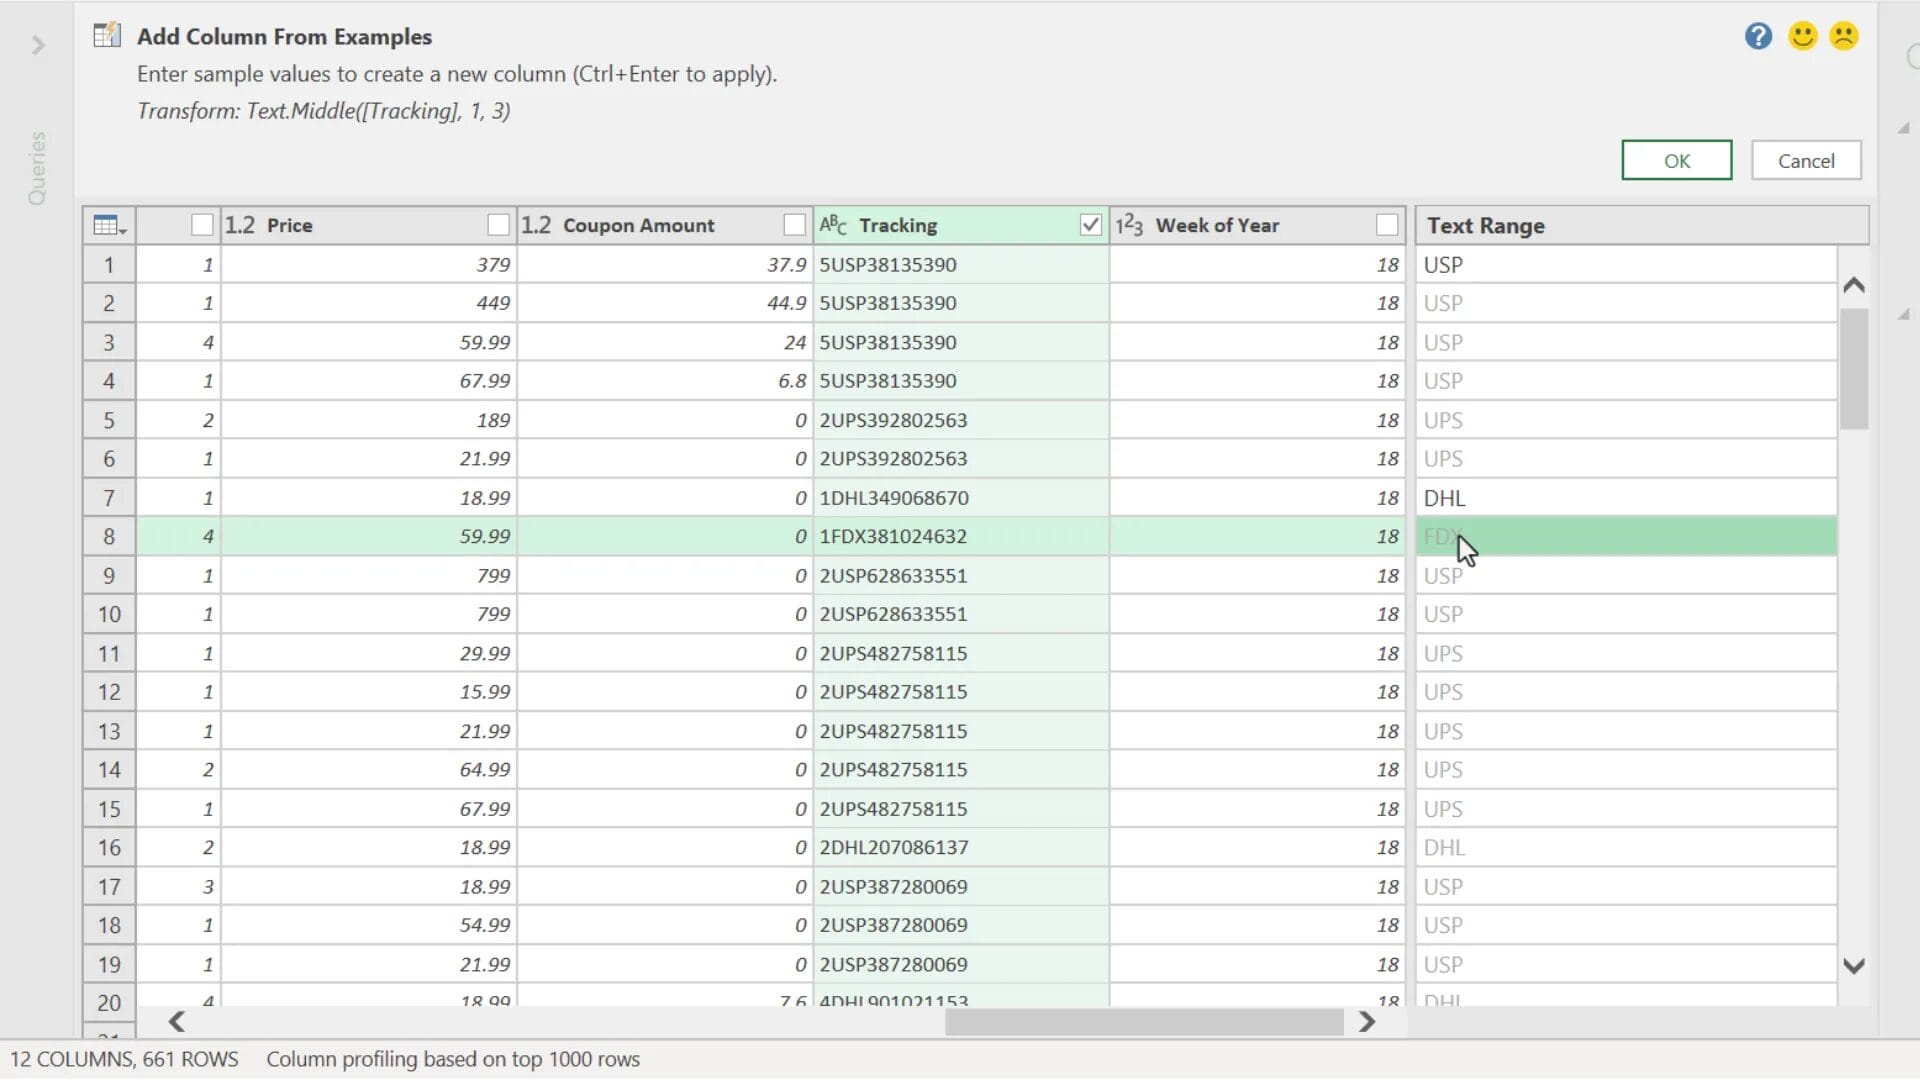
Tip 6: Use AI-Powered ‘Column From Examples' to Extract Data
Power Query has a neat AI feature called Column From Examples that lets you create new columns by providing a few examples of the desired output. This is perfect for extracting parts of text or numbers without writing complex formulas.
For instance, if you have tracking numbers and want to extract the carrier code (the first three letters), you can:
- Select the column with tracking numbers.
- Go to the Add Column tab and choose Column From Examples > From Selection.
- Type a few examples of the carrier codes in the new column (e.g., “USP”, “DHL”).
- Power Query will detect the pattern and fill in the rest automatically.
- Click OK to add the new column.
This feature is a great time saver and requires no coding.
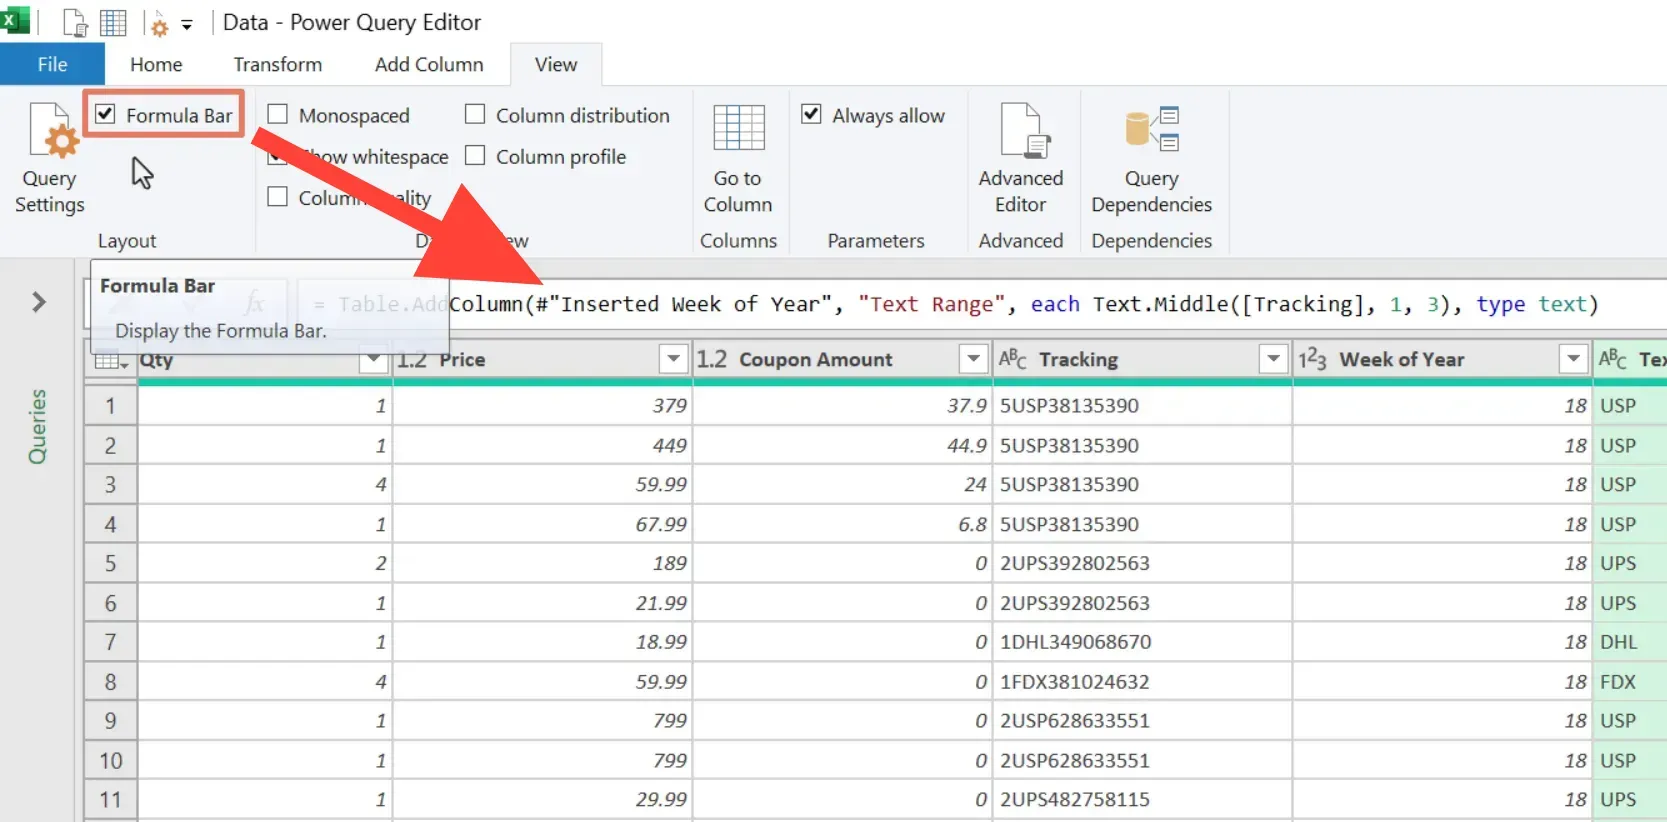
Tip 7: Explore the Power Query Formula Language (M Code)
Behind every button click in Power Query, code is generated in a formula language called M. You can view and edit this code in the formula bar or the Advanced Editor.
While you don’t need to know M code to use Power Query effectively, understanding it can help you perform more advanced transformations and troubleshoot errors.
For example, you might see functions like Text.Middle used to extract part of a text string. The code is similar to Excel formulas but tailored for data queries.
To view the code:
- Enable the formula bar from the View tab if it’s not visible.
- Click on any applied step to see its code.
- Use the Advanced Editor to see or edit the entire query script.
Don’t worry if this seems complex at first. Power Query is still a powerful no-code or low-code tool because most transformations can be done with just clicks.
Bonus Tip: Use Unpivot to Reshape Data for Analysis
One of the most powerful features of Power Query is its ability to unpivot data. Unpivoting converts columns into rows, which is often needed to prepare data for pivot tables or analysis.
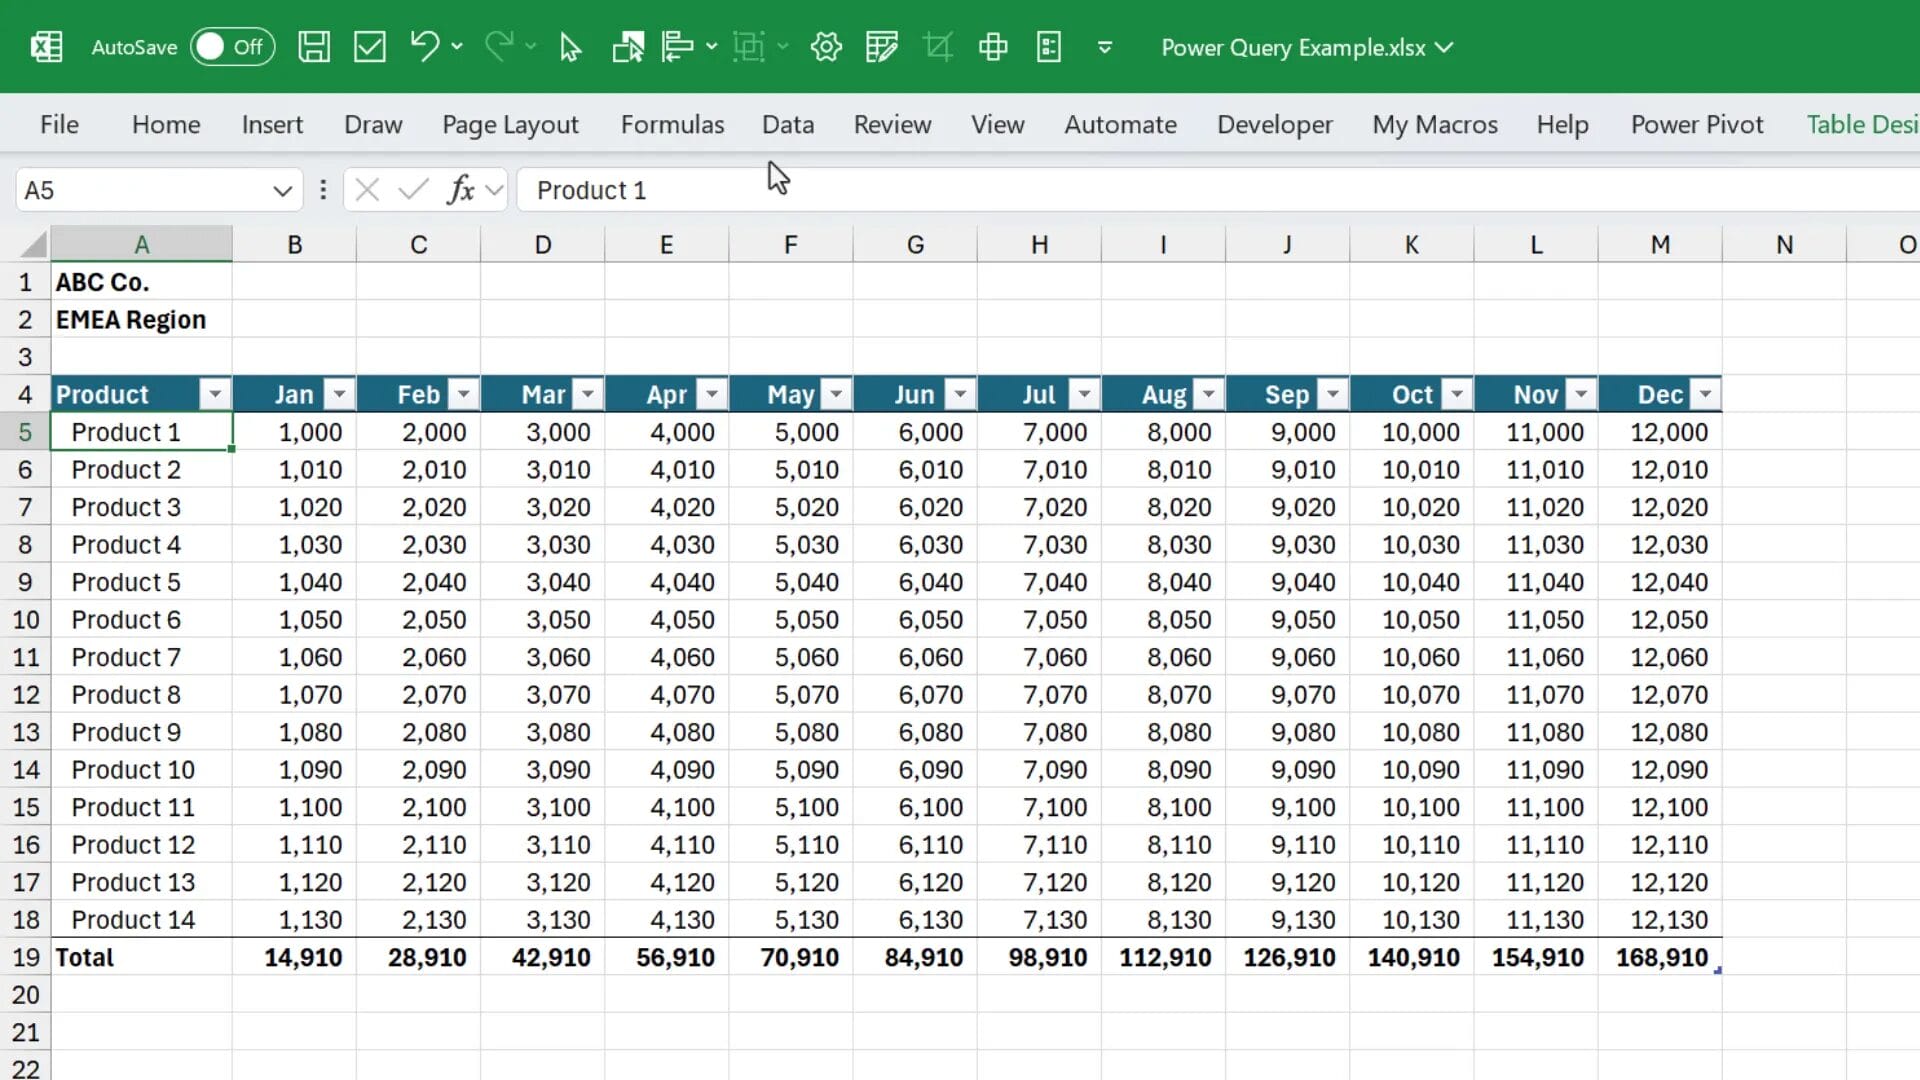
Imagine you have a report with months across the top and products down the left side. This layout is difficult to analyze with formulas and pivot tables.
With unpivot:
- Load your data into Power Query by selecting it and choosing From Table/Range.
- Select the columns you want to keep (e.g., Product).
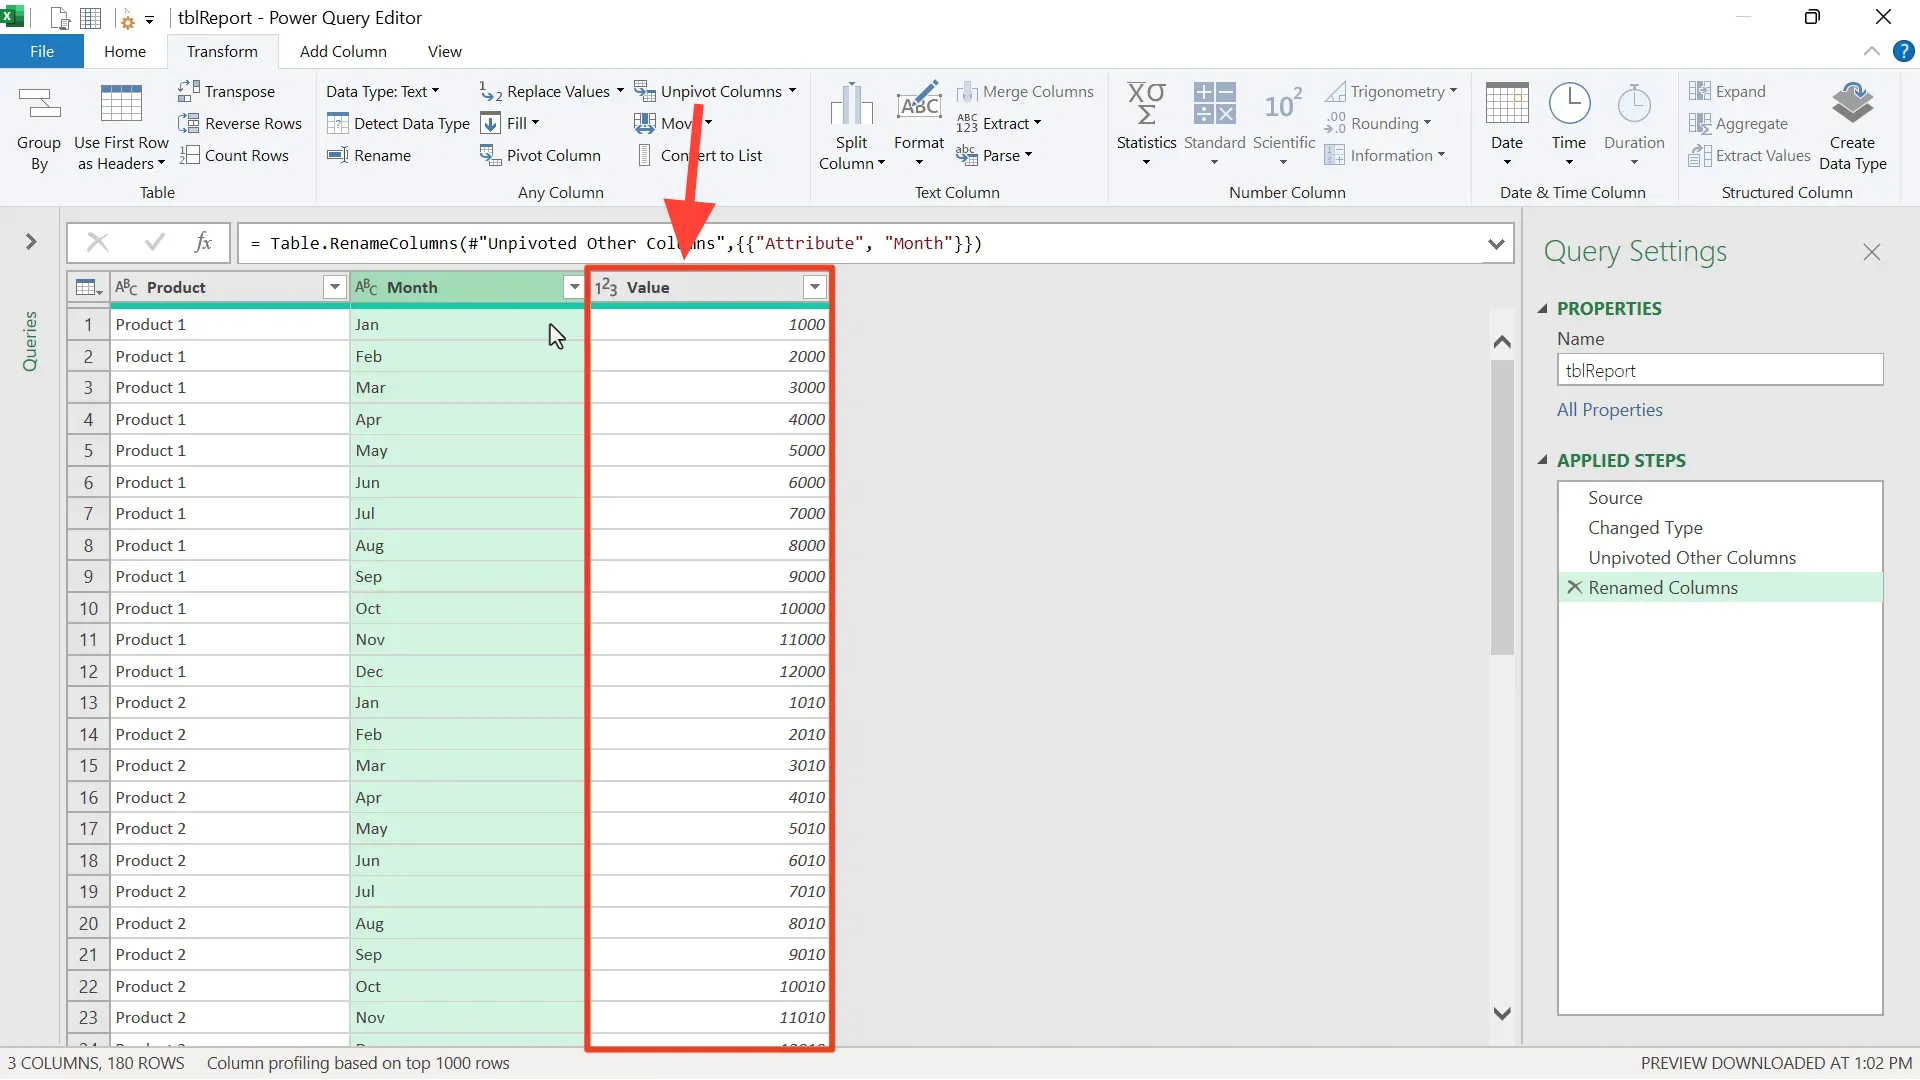
- Use the Unpivot Other Columns option on the Transform tab.
- Power Query will convert the month columns into a single Month column with corresponding values.
- Rename columns as needed and load the data back to Excel.
This one-click transformation replaces complex VBA macros and gets your data into a perfect tabular format for pivot tables.
Conclusion
This Power Query tutorial covered seven essential tips to help you get started and become more efficient with this powerful Excel tool:
- Understand Power Query’s role in data import and cleaning.
- Import and combine data from multiple files effortlessly.
- Clean data by removing blanks and unnecessary columns.
- Use the Applied Steps pane to manage and automate transformations.
- Handle data types carefully to avoid errors.
- Choose the right ribbon tab for transformations and adding columns.
- Leverage AI-powered features like Column From Examples.
- Dive into M code for advanced control when ready.
Power Query is a fantastic no-code or low-code solution that can save you hours of repetitive work. Once you set up your queries, you can refresh them with a click to update your reports with new data.
If you want to deepen your Power Query skills, consider exploring online training courses.

The Power Query Jumpstart Course is a crash course for beginners that will help you get up and running with Power Query in under an hour.
The Power Query Pro Course is an in-depth training program that will teach you how to automate complex data cleanup tasks to save you hours of time and thousands of dollars.
Leave a comment below and let us know how you'll be using Power Query.
Thanks, and have a great day! 🙂


thanks