Bottom Line: Save time and effort cleaning up exported data in Excel with these tips for both manual adjustments and automated transformations using Power Query.
Skill Level: Intermediate
Watch the Tutorial
Watch on YouTube & Subscribe to our Channel
Download the Example File
Follow along with the same workbook used in this post.
Cleaning Up Exported Data
Exporting data from systems like QuickBooks can leave you with messy spreadsheets that require cleanup before analysis. In this post, we’ll cover step-by-step techniques for cleaning data manually and show how you can use Power Query to automate the process, saving you time and effort. First, let's look at cleaning up data manually.
Manual Data Cleanup
When cleaning up exported data manually, start by identifying common issues like merged cells, improper formatting, and inconsistencies in data types. Here are some practical steps:
1. Handling Merged Cells and Tabs
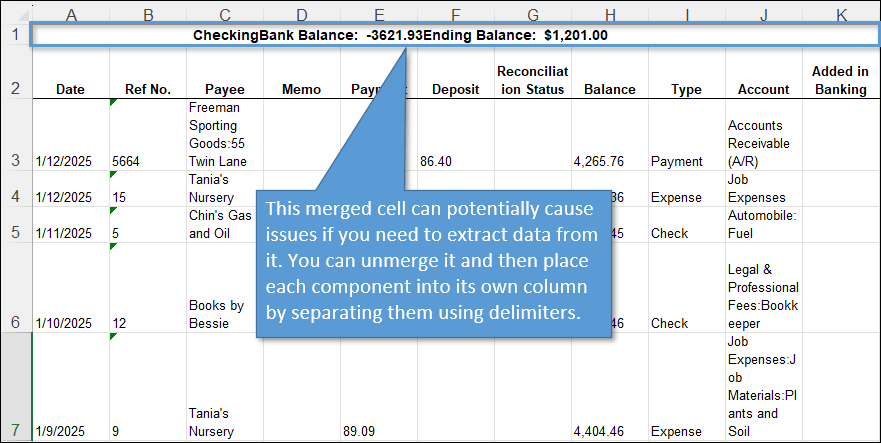
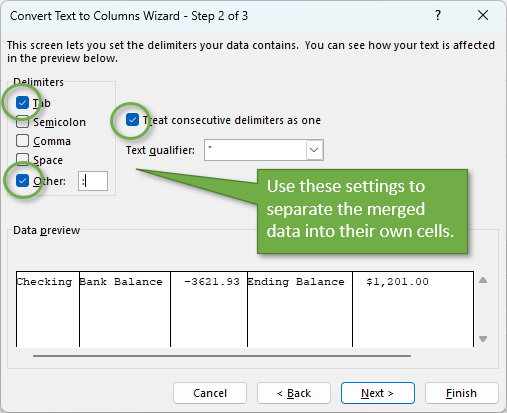
- Unmerge cells: Select the merged cell, then go to Home > Merge & Center to unmerge it.
- Use Text to Columns: For text with tabs, colons, or other delimiters, use Data > Text to Columns to split it into separate cells.
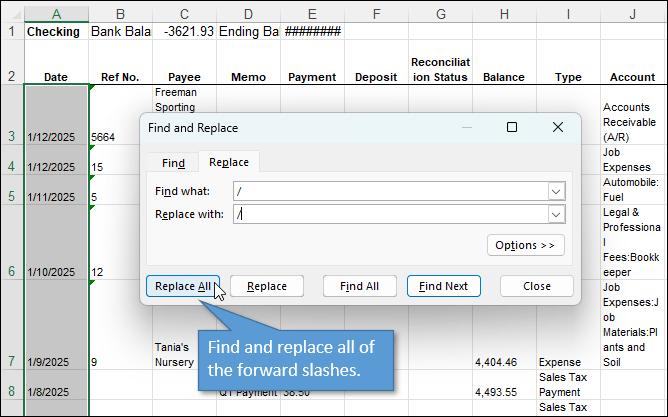
2. Converting Dates Stored as Text
Some exported dates may look like dates but are stored as text. Convert them to date format using this trick:
- Select the cells, press Ctrl + H for Find and Replace, and replace the date delimiter (e.g., “/”) with itself. This forces Excel to reevaluate the data in the cells and recognize the values as dates.
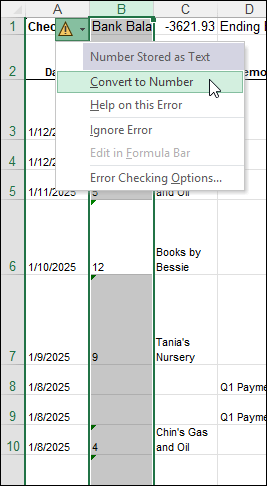
3. Fixing Numbers Stored as Text
Numbers exported as text may cause issues with formulas or lookups. To convert them, select the column, click the Error Box at the top, and choose Convert to Number.
4. Formatting and Adjusting Column Heights
- Remove inconsistent row heights caused by wrapped text by selecting all cells, toggling Wrap Text twice, and then autofitting column widths.
- Adjust the font size and type for better readability (e.g., increase to size 11).

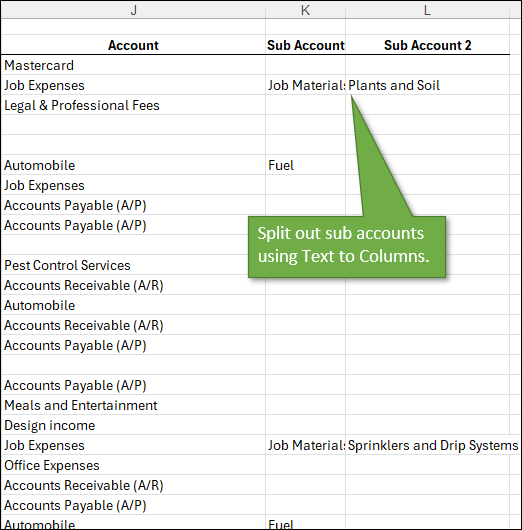
5. Splitting Sub-Accounts
If a column contains sub-accounts separated by colons (or other delimiters):
- Use Data > Text to Columns, select the delimiter (e.g., “:”), and split the data into multiple columns for easier analysis.
Automating Data Cleanup with Power Query
Manual cleanup works, but when dealing with frequent exports, automation is a game-changer. Power Query can automate repetitive steps, ensuring consistent results every time.
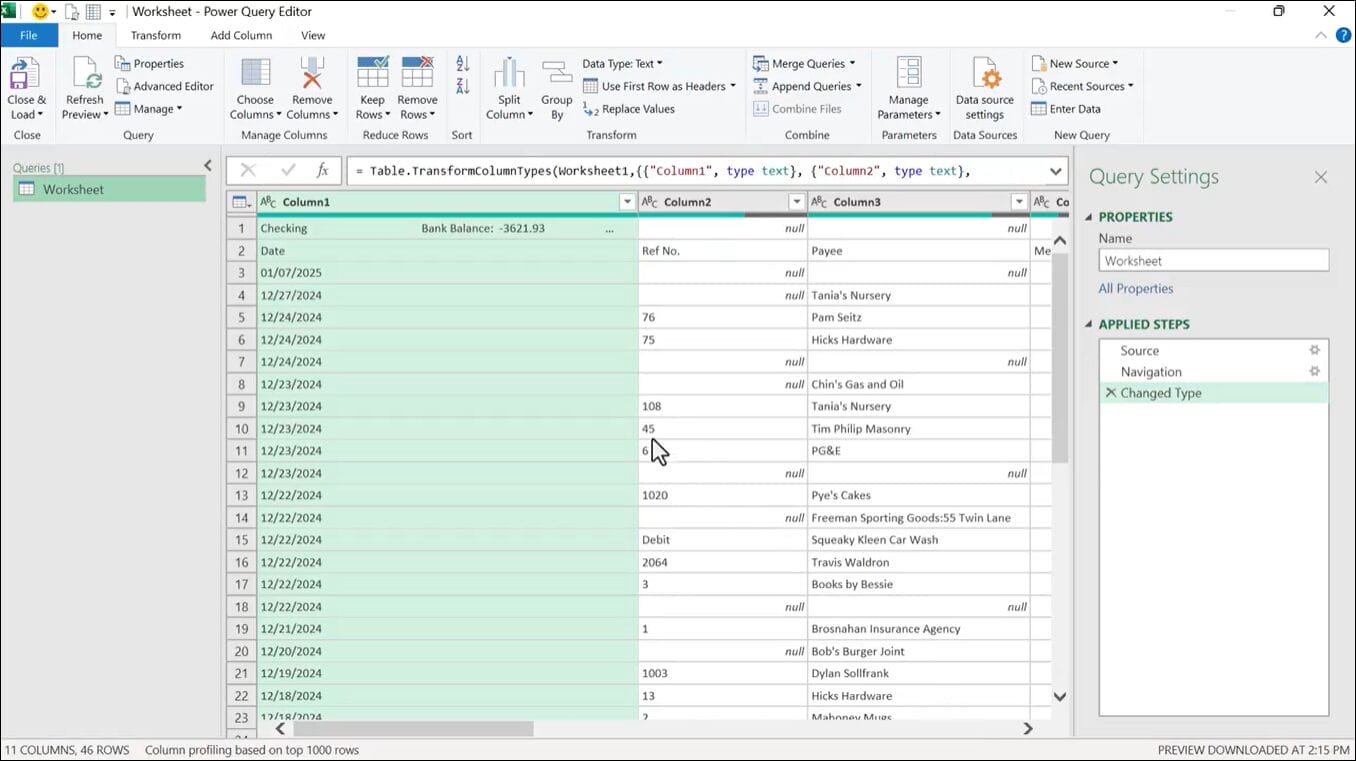
1. Load the Data into Power Query
- Starting with a blank workbook, go to Data > Get Data > From File > From Workbook, select your exported file, and open it in Power Query. You'll see your data in the Power Query Editor, like this:
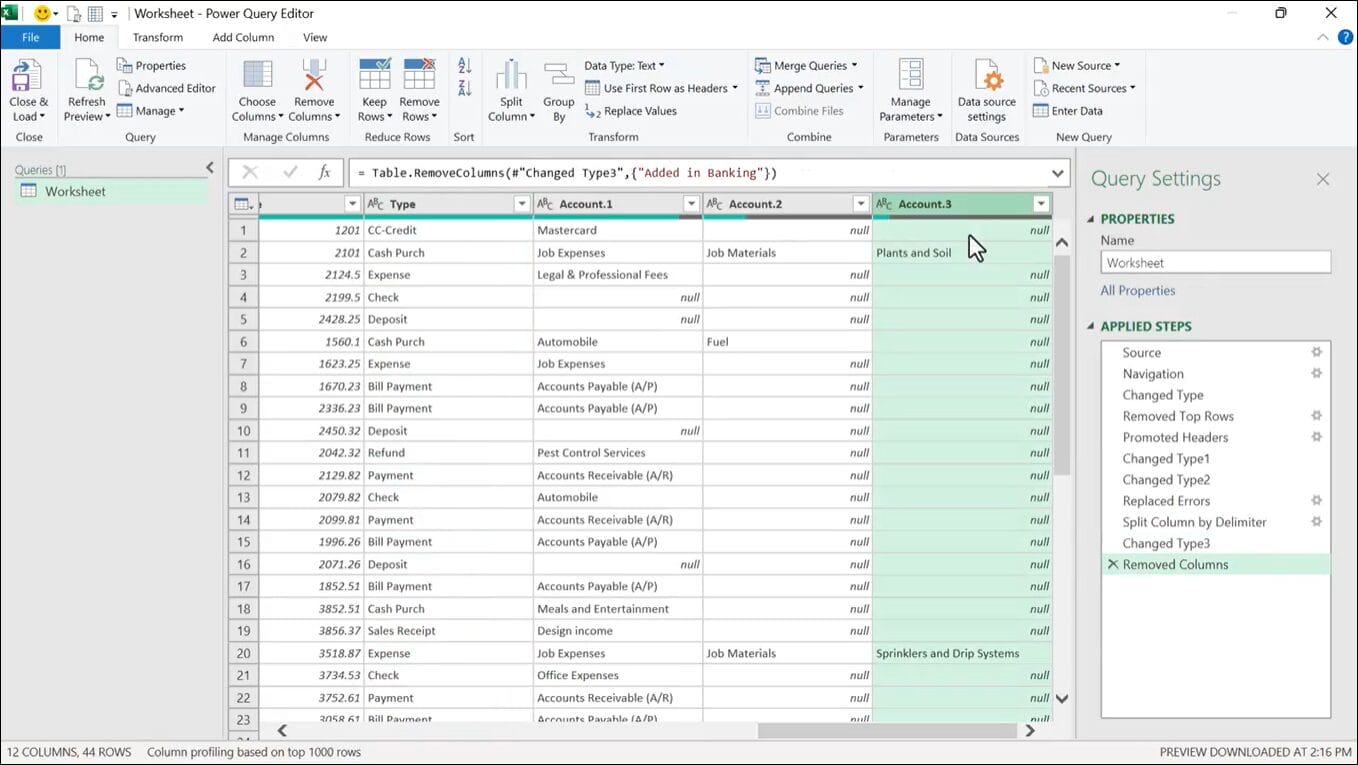
2. Transform the Data
Perform the following transformations in Power Query:
- Remove unnecessary rows: Use Remove Top Rows to delete unwanted headers or blank rows.
- Promote headers: Bring the first row of data up as the column headers.
- Convert data types: Ensure dates, numbers, and text columns are assigned the correct data types.
- Split columns: Use the Split Column by Delimiter option to separate sub-accounts or combined values.
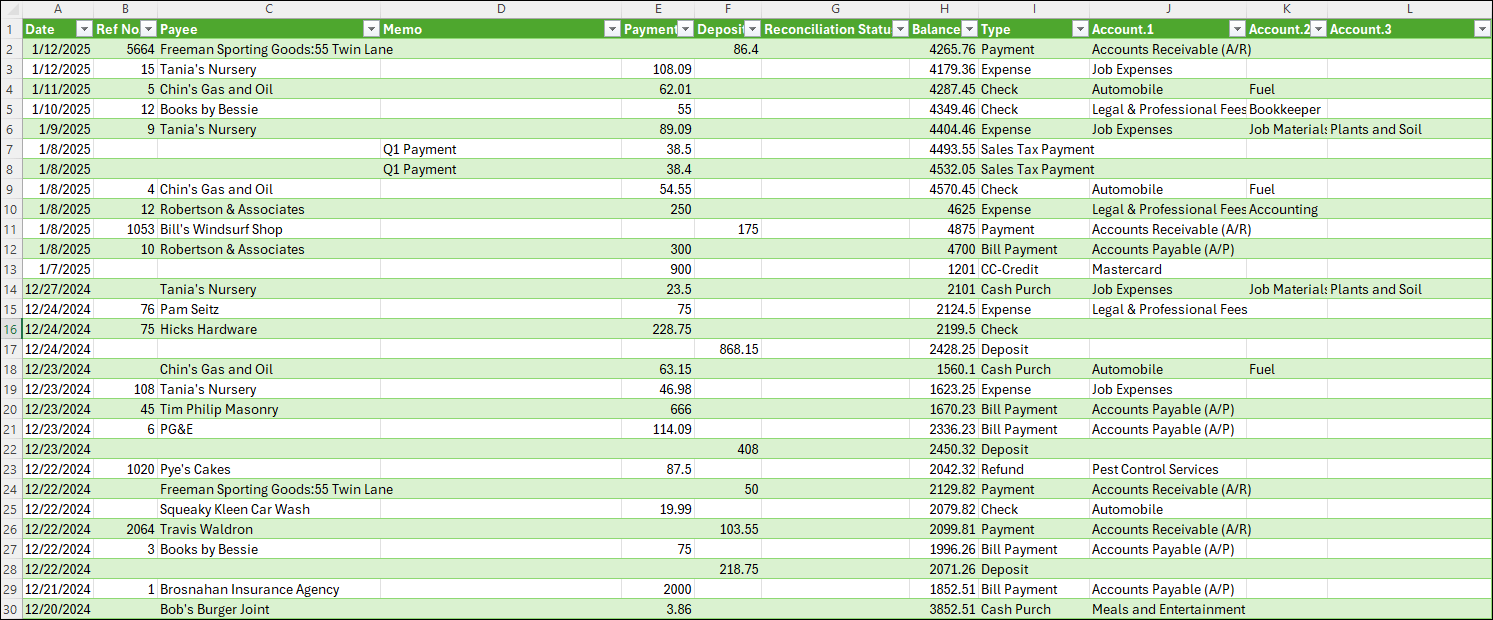
3. Save and Load Cleaned Data
Once your transformations are complete, choose Close & Load to output the cleaned data to a new sheet.
4. Automate with Refresh
For recurring tasks, save the Power Query steps:
- Save the cleaned workbook.
- Replace the exported file in the same folder with a file that contains new data.
- Refresh the query by right-clicking the table and selecting Refresh (or use the shortcut Alt + F5).
If you could use some help with learning Power Query, Here are three resources:
- Start with this tutorial: Power Query Overview: An Introduction to Excel’s Most Powerful Data Tool.
- Watch my webinar on modern Excel “power” tools.
- From there you can take our Power Query Pro Course for in-depth training.
Conclusion
Cleaning up exported data doesn’t have to be a time-consuming task. Whether you prefer manual adjustments or automated workflows with Power Query, these techniques ensure your data is ready for analysis in no time.
Which cleanup method works best for you? Leave a comment below and share your experience!


thank you
I’m struggling with cleaning Firebase Google Analytics event data exports (acquisition, engagement, etc.). The current format is heavily unstructured; multiple tables are vertically stacked within a single file, separated by blocks of metadata rather than being in a clean, tabular format. Has anyone successfully used Python (Pandas) or Power Query to programmatically unstack these blocks and isolate the event data? Any advice on a workflow to strip the metadata and normalize these ‘stacked’ records would be a lifesaver