Bottom Line: Learn how to customize 10 essential settings in Excel to improve your workflow, save time, and enhance productivity.
Skill Level: Intermediate
Watch the Tutorial
Download the Excel File
You can follow along using the same Excel file that I use in the video.
Excel Settings Worth Knowing
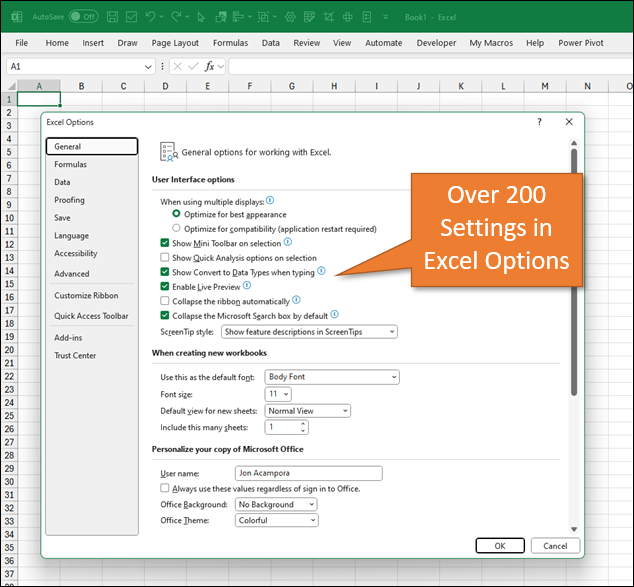
Excel offers a wide range of customizable settings that can streamline your workflow and improve productivity. With over 200 options to choose from, it can be hard to know where to start. In this post, we’ll focus on 10 essential settings that will save you time, simplify your tasks, and enhance your overall Excel experience.
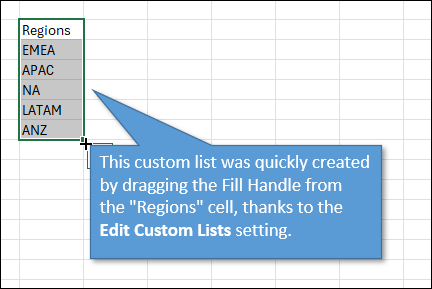
1. Create Custom Lists for AutoFill
Have you ever used the Fill Handle to auto-complete months or days? You can customize this feature by creating your own custom lists. Here’s how to set it up:
- Go to:
File > Options > Advanced > Edit Custom Lists - Then create a new list by typing your entries or import a list from an existing sheet.
With this setting, you can easily auto-complete regions, product names, or any other list specific to your work.
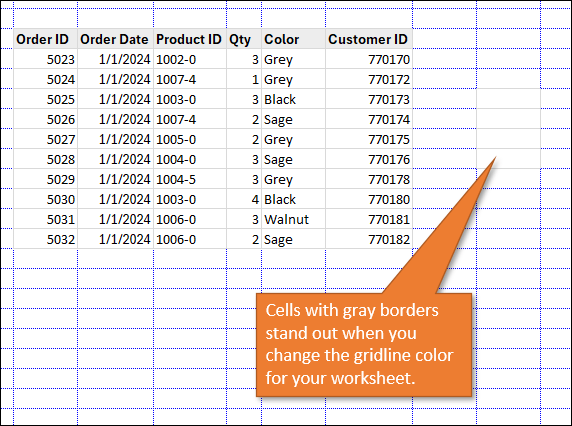
2. Change the Gridline Color for Better Visibility
Sometimes borders can blend in with the default gridlines, making them hard to see. You can change the color of gridlines for better contrast:
- Go to:
File > Options > Advanced > Gridline Color - Then choose a bright color to help differentiate the gridlines from your custom formatting.
This gridline setting applies only to your current worksheet, not the whole workbook.
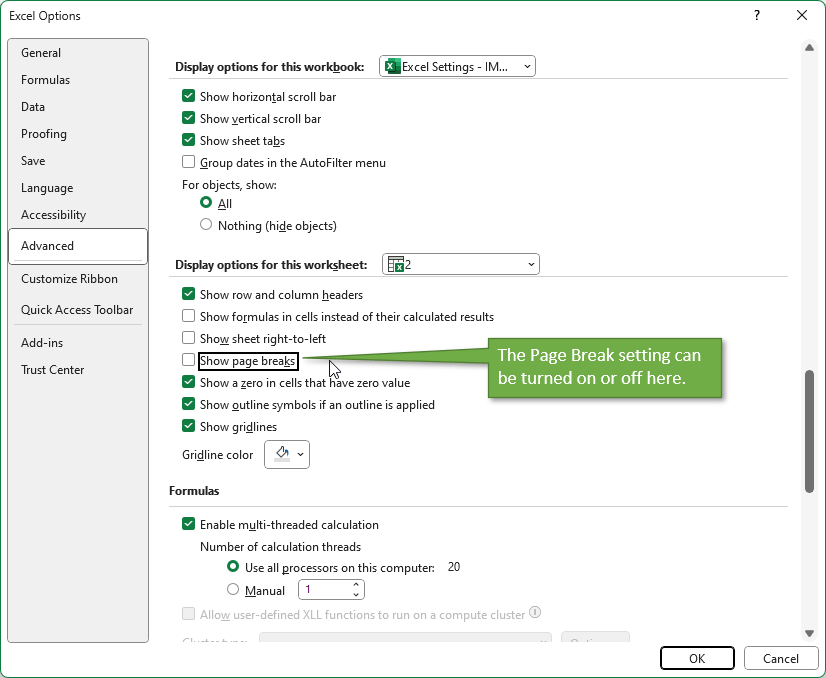
3. Turn Off Annoying Page Break Lines
When previewing or printing your Excel sheets, page breaks can appear as dotted lines, which may be distracting. Here’s how to turn them off:
- Go to:
File > Options > Advanced > Display Options for this Worksheet - Then uncheck “Show page breaks.”
This will remove those dotted lines and give you a cleaner workspace.
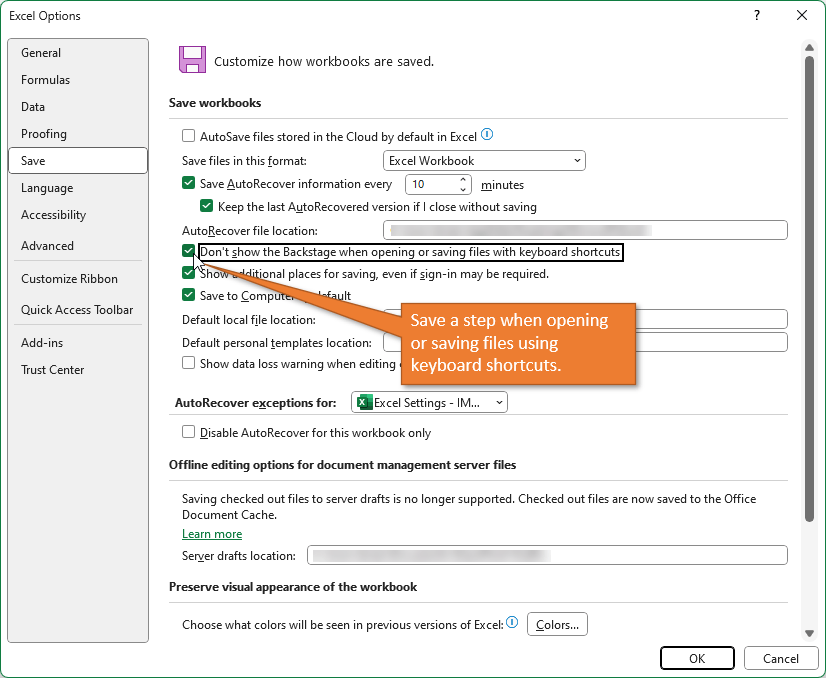
4. Bypass the Backstage View for Faster Saving and Opening
By default, pressing Ctrl + S or Ctrl + O opens the Backstage view. You can skip this and open the standard File Explorer instead:
- Go to:
File > Options > Save - Then check “Don’t show the Backstage when opening or saving files with keyboard shortcuts.”
Now you can quickly save or open files without the extra step.
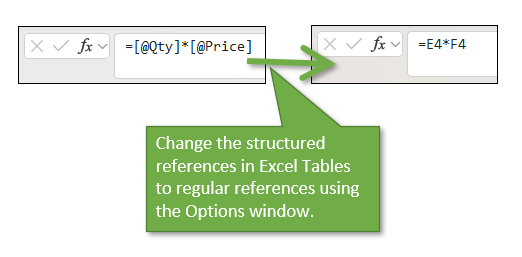
5. Turn Off Structured References in Excel Tables
Excel tables use structured references by default, which can confuse users unfamiliar with them. You can switch to regular cell references:
- Go to:
File > Options > Formulas - Then uncheck “Use table names in formulas.”
This way, formulas will use standard cell references for a more familiar approach.
If you're interested in more details on this topic, check out this tutorial.
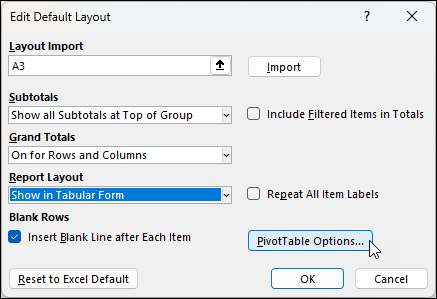
6. Set a Default Pivot Table Layout
If you don’t like the default compact layout of PivotTables, you can change it to a tabular format:
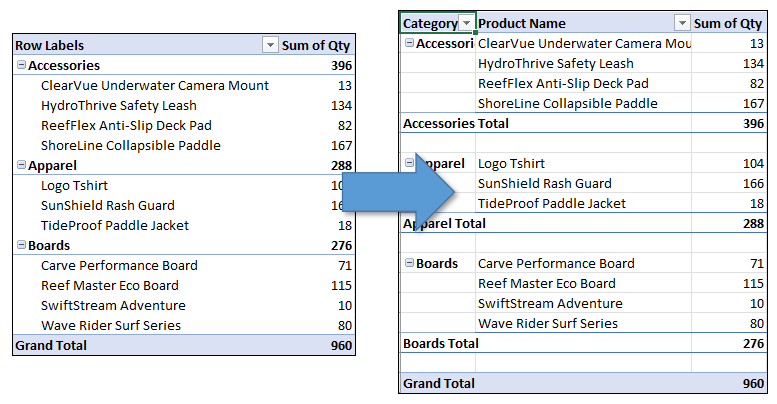
- Go to:
File > Options > Data > Edit Default Layout - Set your preferred PivotTable format (e.g., tabular layout with blank rows).
- If you'd like to change even more settings, you can do so by clicking the PivotTable Options button.
Every new PivotTable you create will automatically adopt your chosen layout.
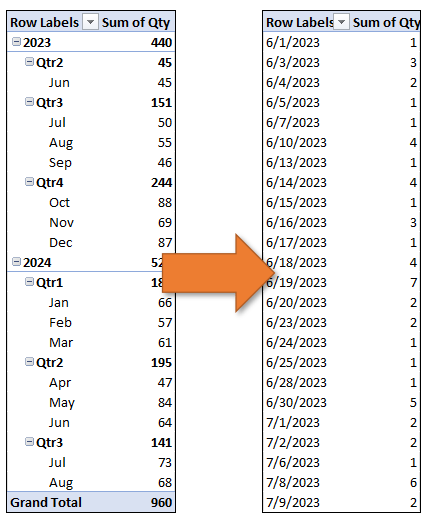
7. Disable Automatic Grouping of Dates in PivotTables
By default, dates in PivotTables are automatically grouped by years, quarters, and months. To disable this:
- Go to:
File > Options > Data - Then check “Disable automatic grouping of dates in PivotTables.”
This allows you to display individual dates without automatic grouping.
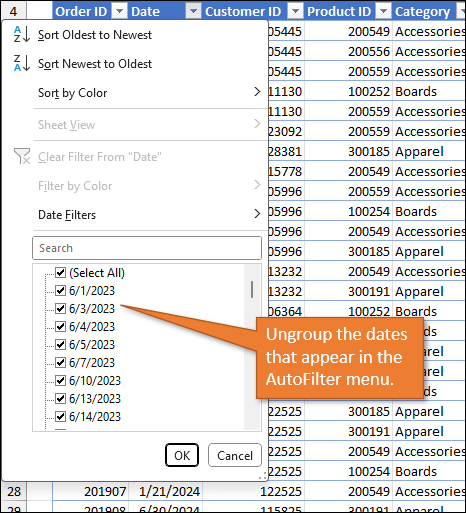
8. Ungroup Dates in AutoFilters
When using AutoFilters, dates are collapsed by default, making it harder to find individual dates. You can change this:
- Go to:
File > Options > Advanced - Then uncheck “Group dates in AutoFilter menu.”
Now all dates will appear expanded, making it easier to filter specific dates.
9. Customize the Quick Analysis Tool
The Quick Analysis tool provides an easy way to analyze data. If you find it appearing too often:
- Go to:
File > Options > General - Uncheck “Show Quick Analysis options on selection.”
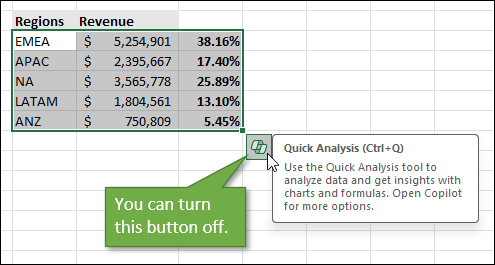
You can still access the tool by pressing Ctrl + Q whenever you need it.
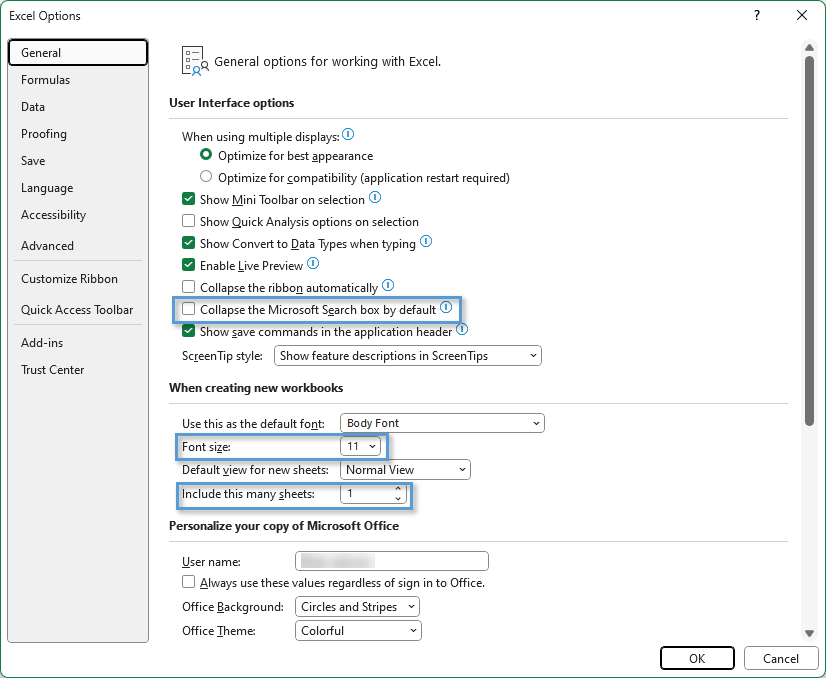
10. Change Excel’s Default Workbook Settings
And finally, if you want all new Excel workbooks to open with only one sheet, want to collapse the search box, or prefer to use a specific font size:
- Go to:
File > Options > General - Then adjust settings to your preference..
This makes it easier to create workbooks that match your preferred style without manual adjustments.
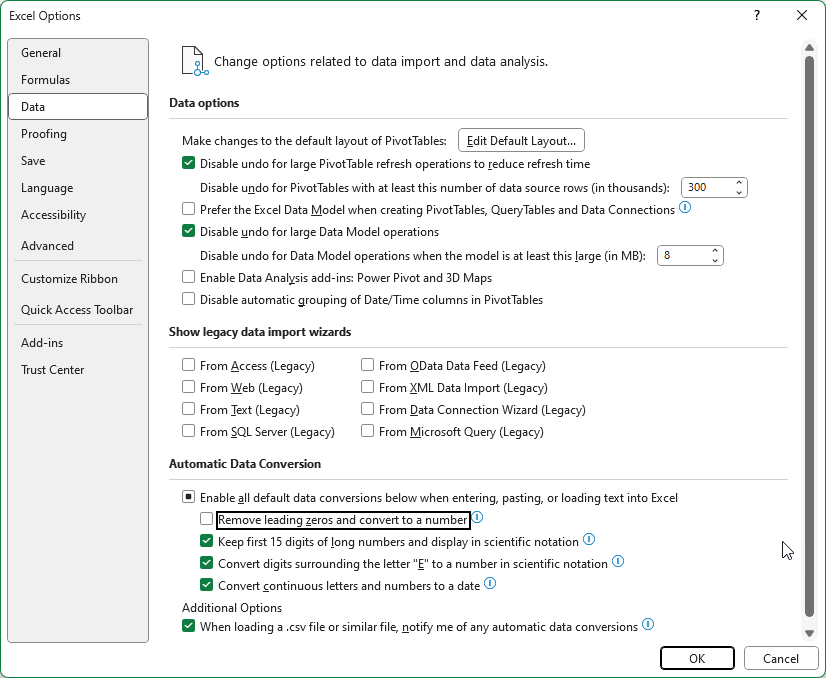
Bonus: Automatically Keep Leading Zeros in Numbers
Working with numbers that have leading zeros, like ZIP codes? Excel automatically removes these unless you store the data as text. But there’s a new option in Beta to make this easier:
- Go to:
File > Options > Data > Automatic Data Conversion - Then uncheck “Remove leading zeros and convert to number.”
Now Excel will keep leading zeros without the need for apostrophes or manual text formatting.
This post dives deeper into Data Conversion settings, if you are interested in learning more.
Conclusion
These 10 Excel settings can make a big difference in how efficiently you work with data. Whether it's customizing lists or formatting tables, these tips will save you time and simplify your workflow. I encourage you to explore Excel options and tweak the settings to suit your needs.
What Excel settings do you find most useful? Let us know in the comments!


This was awesome, as are all of your vids. Thank you so much for posting